
A Toy Eye
How to make a working model of an eyeball (or camera) from simple parts.
Here is another craft project that amounts to a child's version of a scientific model: a picture-making box that illustrates the function of both cameras and eyeballs.
If you spend any time playing with magnifying lenses, you may notice that they have the ability to make images appear on screens. If you hold them over a piece of paper at just the right height, they make an image of the overhead light appear on the paper. If you stand on the dark side of a room and hold up a lens at just the right distance from an index card, you can make a picture of the window (or lighted aquarium, or television, or desk lamp) appear on the card.

Knowing this, why can't we make a little “picture-making-box”, with a lens and a screen fastened together at the proper distance. If we make something like the following, we should be able to carry it around and point the lens at bright things, and make images appear on the screen. (We'll make the screen translucent, so we can see the image from the back side.)
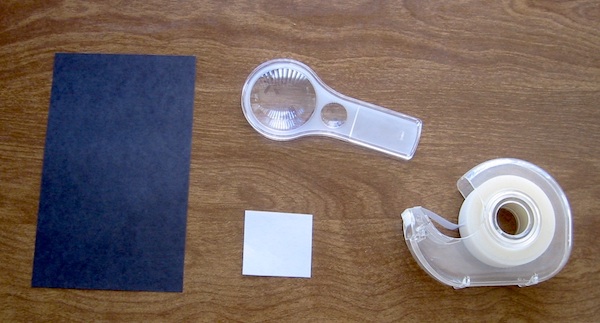
The parts necessary to make this are simply a magnifying lens, a rectangle of black construction paper, a small square of wax paper or tracing paper, and some scotch tape.
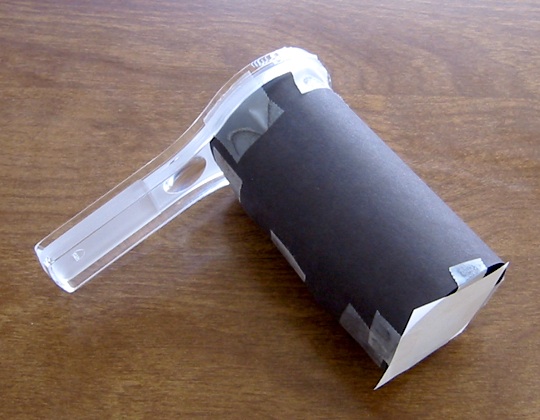
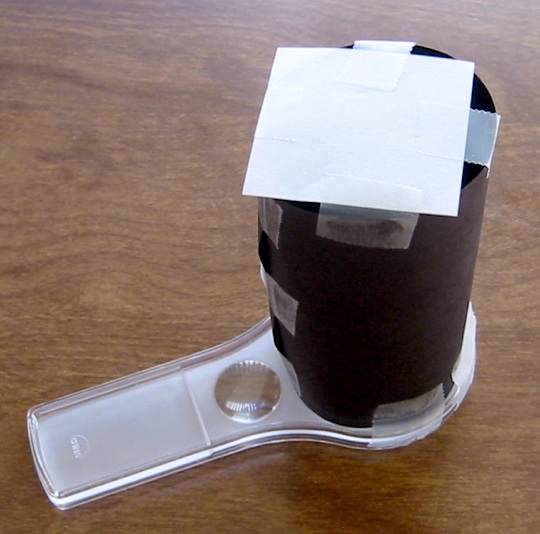
We make the artificial eye simply by rolling the piece of black construction paper into a tube and taping it to the lens, then taping the piece of wax paper or tracing paper to the end. The only difficulty is that we need to make the length of the tube just the right distance, or the pictures will be blurry. Therefore we will have to carefully measure the “image-making distance” of the lens, and make the width of the black rectangle exactly that distance. (Different lenses will have different distances, depending on the exact shape of the lens.) One way to do this would be to hold a lens at the end of a ruler and slide a card back and forth along the ruler until a sharp image of a distant bright scene appears on the card.
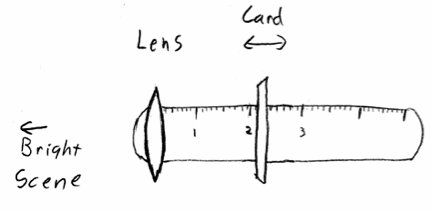
When you make the measurement, avoid having the bright scene too close to the lens, or your camera will end up “near-sighted” and will only make clear images of close things. Several feet should be plenty for most small lenses.
Once we know how far the screen has to be from the lens, we can cut a rectangle of black construction paper with this width, and enough length so that it can be rolled into a tube. (The dimensions that fit my lenses resulted in tubes that very much resembled black toilet-paper rolls.) The assembly of the camera consists simply of taping everything together. Obviously you need to be careful not to cover the lens with tape.
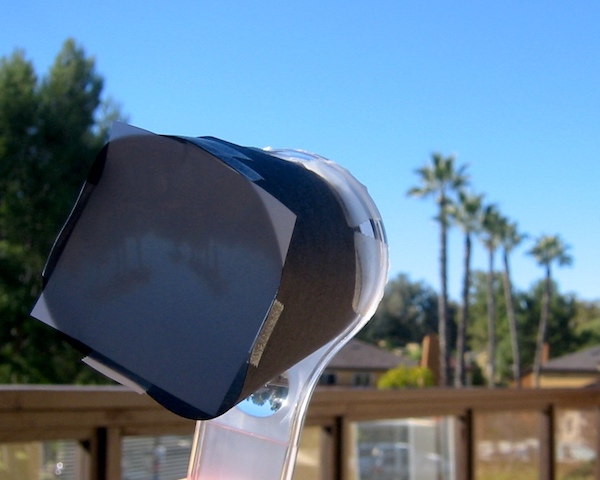
Once the camera is assembled, you should be able to point it at any bright scene and have a picture of the scene appear on the screen. If you see a scene, but it is blurry, the screen might be a little too close or a little too far from the lens. If you don't see anything, either the screen distance is way off, or the scene is too dim or there is too much ambient light. I can generally see outdoor sunlit scenes quite clearly, as long as I myself am in the shade of a tree or building, as the following picture illustrates. Notice the upside-down palm trees on the screen of the camera.
If you want to experiment with additions to the camera, you could try wrapping a viewing shroud around the screen end to help darken the screen. You could also try making the camera in two “telescoping” pieces, one tube sliding inside another, so you can adjust the screen distance and focus on close things. If you want to try recording images permanently, as a real camera does, I'm afraid that will be a bit trickier. There is such a thing as “photosensitive paper” with which you might be able to record “black-and-white” pictures in sunshine, and I'm sure there are various kinds of simple photographic film available to hobbyists, but I've never looked into this.